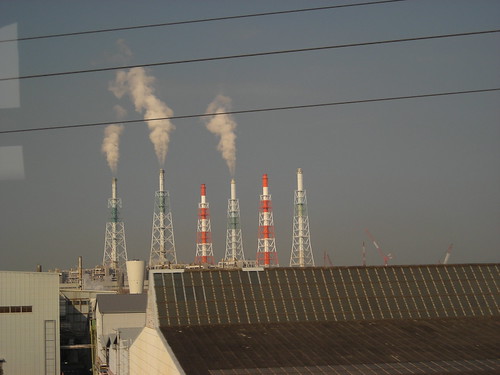
How to Solve Common Chimney Drafting Problems

When it comes to chimneys smoking, there are no two fireplaces that function in the same way. There can be many reasons why your chimney is not working properly and smoke is getting into your home.
The Height Of The Chimney
There is an appropriate measurement rule that must be followed for every chimney. If the measurement is followed you should not have any problems with your chimney, however, there can be exceptions. To determine if the rule has been followed you should measure ten feet from the chimney to the closest object. This object can be the line of the roof, where an addition starts, or the peak. Once you find the ten foot mark measure up two feet and that is the height that you chimney should be.
The chimney must be at the proper height to catch wind. It is not necessary for the chimney to be higher than the peak of your roof. If the peak is in the ten foot clearance area then it should. This is because the wind will blow across the roof and it should make an updraft and pull the smoke up with it.
It is sometimes necessary to raise the height of your chimney if a certain situation in pressure happens. There have been some products introduced in the market that can help with the price of raising your chimney.
You can use a flue extender to raise your chimney up to three feet. They are usually made of copper or stainless steel and have been proven to eliminate the draft problem. It is much less expensive to use one of these than it is to have your chimney raised. Chimney pots are another method to eliminate the draft problems on your chimney. They have been around for centuries and were originally made from clay.
The newer chimney pots are made from copper. They are more expensive than the clay variety of pot, but they are very beautiful and can add to the look of your home. When copper ages it will turn a green color that is quite beautiful.
For those fireplaces that are metal zero clearance it will be necessary for you to get the manufacturers model number and the name of the manufacturer so that you can get the size of pipe you will need to raise your chimney. There may be a regulation in your city that requires you to enclose the pipe in a chase.
This might cause you to have to build the chase to the new height. This may solve some of your problems with smoke entering your home, but if it does not there may be more problems with your chimney.
Chimney caps like the Vacu-Stack or the Windbeater are another solution for your draft problems.
They are specifically made to create an updraft when the wind blows across your roof and chimney.
The cap will stay put and the wind will circle around the cap and make an updraft. This works fairly well with masonry chimneys, solid pack chimney pipe and metal chimneys. You can find a variety of sizes and adaptors that will work on most masonry chimneys.
If you have a metal chimney you will not need an adaptor. You can measure the inner pipe if you have an air cooled chimney pipe with two or three pipes inside. A collar for the outer pipes comes with the Vacu-Stack for these types of chimneys.
If you have a drafting problem with your furnace or water heater you can generally find smaller sizes to fit these.
How to Solve Common Chimney Drafting Problems
Maroon 5 - Daylight (Playing for Change)
Video Clips. Duration : 3.93 Mins.
Maroon 5 - Daylight (Playing for Change)
The Daylight (Playing For Change) video is part of the Playing For Change music project series which brings together musicians from around the world. All profits go to their non profit foundation which builds music schools for children around the world. All PFC performers where recorded and filmed live outside and this musical journey takes us from the streets to the stage to the hearts of the people. Playing For Change is a movement uniting people everywhere through music. Music video by Maroon 5 performing Daylight Play for Change. (C) 2012 A&M/Octone Records
Maroon 5 - Daylight (Playing for Change)
Maroon 5 - Daylight (Playing for Change)

Maroon 5 - Daylight (Playing for Change)
No URL Maroon 5 - Daylight (Playing for Change)
How to Measure For a Chimney Liner Kit
To measure for a chimney liner kit you need to determine the physical dimensions of your chimney as well as the specific requirements for the type of appliance you are hooking the liner to. A chimney liner kit that will serve a fireplace needs to have the largest diameter pipe that will fit inside your flue, whereas the liner size required for other fuel burning appliances will be determined by the manufacturer's specifications and local safety codes.
The basic measurements you need before you select a chimney liner kit are the height of your chimney and the inside dimensions of your existing flue. From the top of your chimney, measure to the top of the fireplace smoke chamber or the connection point for your woodstove or furnace. You can use a long flexible tape measure or tie a bolt or other weight to a string and lower it down your flue to the point where the bottom of the liner will be connected and then measure the string to determine the chimney height. Measure the inside dimensions of the clay tile liner (if your chimney is lined with tiles) at the top of the flue.
For a fireplace, you should have a liner with a cross sectional area no less than one tenth of the area of the fireplace opening. This ten to one ratio is a rule of thumb that can vary depending upon the height of the chimney and other factors. If the liner diameter is too small, your fireplace will not draw well, resulting in smoky fires and smoke-filled rooms. If the size of liner that you need for your fireplace is too large to fit inside your existing flue, you may need to repair your clay tile liner rather than inserting a steel liner inside it. An alternative would be to modify the opening of your fireplace to make its effective area smaller, perhaps by installing doors with adjustable airways or by installing a wood burning insert.
To measure for a chimney liner kit that will serve a wood stove, furnace, hot water heater or other fuel burning appliance, you should follow the manufacturer's specifications. The inside diameter of the vent opening on the appliance will determine the ideal diameter of your chimney liner. It is a good idea, and a code requirement in some places, to insulate the outside of a chimney liner, so you will need to size your liner to allow space for insulation between the outside of the liner and the inside of the flue. An insulated chimney liner will keep the exhaust gases hotter all the way out of the house and minimize condensation of creosote and acidic water inside the chimney.
Getting good measurements for a chimney liner kit before you buy will save a lot of time and frustration. A properly sized and installed liner will make your house safer and more energy efficient while extending the life of your chimney.
How to Measure For a Chimney Liner Kit
Justin Timberlake - Suit & Tie (Audio) ft. JAY Z
Video Clips. Duration : 5.47 Mins.
Justin Timberlake - Suit & Tie (Audio) ft. JAY Z
BUY NOW: smarturl.it Music video by Justin Timberlake performing Suit & Tie featuring JAY Z. (C) 2012 RCA Records, a division of Sony Music Entertainment
Justin Timberlake - Suit & Tie (Audio) ft. JAY Z
Justin Timberlake - Suit & Tie (Audio) ft. JAY Z
Justin Timberlake - Suit & Tie (Audio) ft. JAY Z
No URL Justin Timberlake - Suit & Tie (Audio) ft. JAY Z
Having a Wood Burning Stove Fitted - What Happened to Me When I Had to Replace My Old Parkray Boiler
First things first, the house or cottage in which we live was built in the late 19th century mainly of stone construction, for farm workers to live in close to their work on the farm ( normally called a tied cottage) and had been occupied by a family working on the farm prior to our move into the property in 1987, since when a certain amount of modernisation had been done by ourselves over the years, new bathroom, showers and kitchen etc.
At the end of July this year we had the chimney sweep in to clean the soot from our two chimneys.
The one that had been used non stop over last winter as our main heating was the worst as it had a Parkray multi fuel heater fitted into the wall with a surround of tiles and tiled hearth; this fire had been there since before we moved in and although pretty ugly had given good service over the years by heating four radiators and the hot water in the winter.
We had it fuelled by anthracite eggs or ovals, which gave plenty of heat but this fuel is getting very expensive, it also comes with certain ecological issues attached being a fossil fuel, which spoils our carbon footprint. We had occasionally burnt wood in it but it was not an ideal wood burning stove due to the grate being built for a coal based fuel.
"BAD NEWS" said the sweep when he had finished the job, "your back boiler is leaking into the grate and there is a lot of wet in the bottom of the grate".
So, we had to bite the bullet and replace the fire with a new one of some sort, we had looked at all the different options over the years and decided against oil because we have access to plenty of wood from the farm. Also most of the modern systems depend on having electricity to ignite and control their burners, and because we are subject to power cuts in the winter, just when one is most vulnerable to the cold; it was important for us that we had a system that will work on its own, we wanted it to continue to heat the water and the radiators upstairs by convection to keep the house warm until the power supply returns.
Off we went to StoveTec in Hereford UK to look at what was available to us and just how much it would cost, we looked at all the models in the showroom and chose a Hunter multi fuel with internal boiler (Hunter are a part of the Parkray Group apparently), with single door with one clear pain of glass in the front, which I liked because it had none of the fiddly bits just clean lines and simple design.
Steve the owner of StoveTec then arranged to come out to do a site survey on the next Wednesday; whereupon the measurements for the base and the layout of all the pipe work was checked, and the chimney stack was inspected from the garden.
The quote, which was very reasonable and included the fitting of a new stainless steel chimney liner, was accepted and it was arranged for the men to start work the next week.
The team duly arrived and proceeded to start with the removal of the original fireplace, in preparation, I had already turned off the water and drained the system with the garden hose prior to their arrival.
As with all building workers, we made sure that copious amounts of tea, instant coffee and biscuits were available throughout the day in large mugs with a good quality tea bag per mug with various spoon-fulls of sugar and whole milk according to taste, which after the first day we learnt off by heart.
The removal of the old fire place created a large amount of dust and noise from the hammer drill and chisel, and a large quantity of waste rubble and a pile of bricks that I decided to save for any small garden project which may require a few bricks, a barbecue comes to mind, which is not a high priority for us but may come in handy in the future .
Once the old tiled hearth and surround had been broken up, the feed pipes to the boiler were now exposed enough to be able to get a hack saw in to cut the pipes and free up the stove for removal. It was very heavy and had to be manoeuvred onto a sack trolley to be wheeled out of the house and lifted in to the truck for scrap.
It was then that we were able to see what we thought was the full extent of the space available at the back of the fire, we could see a large amount of brick and stone infill, for what we thought must have been the original cast iron black grate; complete with an oven on the side, which looked so pretty in pictures but were extremely difficult to get the oven up to temperature and were dirty as the fire was open and not enclosed; but they normally had a trivet to hang or place a pan or kettle over the fire for cooking soups and stews.
But No, they had to remove two more courses of brick before the final aperture was revealed in all its glory, it really made the room look so much bigger, once all the rubble had been removed and a bit of tidy up had been done.
Meanwhile the men had placed the climbing frame and ladders up onto the roof and around the chimney stack so that the new stainless steel liner could be lowered into the chimney stack, once it was in place a plate was cemented in and a new chimney pot and cowl fitted to top out the flu.
Where the liner came down into the fireplace it was fitted into an enamelled stove pipe via a socket fitting on the end of the cut flu liner, and then into the socket on top of the new Hunter Stove.
Before the new stove can be placed into position there had to be a new base fitted on the floor of the cavity, we finally decided on large pieces of slate, which is more in keeping with an old cottage than the polished granite that we thought about first, this is fixed in place on the floor of the base level with a coat of cement and tapped level.
The next job was to fit a metal plate to the inside of the fire place above the new stove, where the new flu came through a hole cut in the middle to block out the rest of the chimney and stop any of the soot from the old fire falling down into the room in the future; this was sealed around all the edges to finish the lower part of the chimney off (this was later sprayed with black enamel paint).
With the hot water pipes connected to the boiler (the out flow hot to the top, and the inflow connected to the bottom on the opposite side of the boiler cold), the water was then turned back on and the system filled to check for leaks and and test under pressure with the pump running.
Then it was all systems go for ignition to see how it all worked with a fire burning in the grate. It was simply amazing just how fast the boiler heated up and hot water started to move up the pipes to the hot water cistern. It is now a week since we have had it up and running and we have now got the hang of it managing to keep it in over night with the aid of some very dry seasoned oak blocks.
There is no doubt in my mind that the main thing with running a wood burning stove is to have dry seasoned wood at all times otherwise it will not burn correctly and it willl not get hot enough, plus it will clog up the chimney with tar and get the glass front of the door all covered in a dirty black coating of soot and tar. I always think that if the wood burns slowly down like a cigarette glowing across its length the stove is working correctly and that the wood is dry.
The best types of wood to burn locally around us is oak or ash if you can get it, but I also have access to plenty of willow, which is OK if very dry, I occasionally get a bit of pine, which burns very fast and noisily spitting and popping away in the grate.
I can thoroughly recommend our wood burning stove and I look forward to many years of warm winters by the fire in the future.
Having a Wood Burning Stove Fitted - What Happened to Me When I Had to Replace My Old Parkray Boiler
ONE OK ROCK 「Deeper Deeper」
Video Clips. Duration : 4.05 Mins.
ONE OK ROCK 「Deeper Deeper」
8th Single 『Deeper Deeper / Nothing Helps』 SUZUKI SWIFT SPORT CM SONG Jan 09 , 2013 on sale iTunes URL: smarturl.it
ONE OK ROCK 「Deeper Deeper」
ONE OK ROCK 「Deeper Deeper」
ONE OK ROCK 「Deeper Deeper」
No URL ONE OK ROCK 「Deeper Deeper」
Airtight Wood Stoves Have Higher Efficiency Than Other Wood-Burners
When it comes to purchasing a wood stove for your home, there are three basic types you can choose from: box stoves, air-tight stoves, or pellet burners. There are pros and cons to each type, with people having their own personal preferences. Although box stoves don't burn as efficiently, because they aren't air-tight, they are the least expensive option. Unfortunately, quality often suffers as a result of the price. Air-tight stoves are recommended for highest efficiency, but their price tags will reflect their high quality. Pellet stoves have recently come into popular use. They give out steady, even heat, but the controls that operate them won't work if the power goes out.
Since there are serious negatives when it comes to box stoves and pellet burners, you may want to concentrate on the purchase of an air-tight wood stove. These models feature a sealed firebox and a door that fits snugly. The air-intake damper is either manually or thermostatically controlled. This allows air to circulate around the firebox and controls the rate at which fuel is being consumed. Air-tight stoves burn for long periods of time without requiring owner attention. Unfortunately, since the stove burns slowly, the chimney and pipes can become heavily coated with creosote which will need to be manually cleaned away with a soot remover or a chimney brush.
You can purchase stoves which are air-tight which have many different finishes. What you need to realize is that the finish of the stove can make it more or less efficient to operate. The best coating is a flat black finish which causes the stove to yield 90 - 98% usable heat. Flat paints and enamels will radiate between 70 and 90% of their heat, while stoves with shiny surfaces will give you efficiencies of less than 60%, with light colored stoves being at the bottom of the charts. This is a fact that many homeowners are unaware of, but it will definitely affect the effectiveness of your wood stove.
An air-tight wood stove is an excellent choice for homeowners who are looking to lower their heating bills significantly. With a stove like this, you will be able to shut down the fire by closing the damper, but the hot gases will stay in the stove much longer and continue to heat the air in your home. This can be a perfect solution for overnight heating.
Airtight Wood Stoves Have Higher Efficiency Than Other Wood-Burners

Maroon 5 - Daylight (Playing for Change)
Video Clips. Duration : 3.93 Mins.
Maroon 5 - Daylight (Playing for Change)
The Daylight (Playing For Change) video is part of the Playing For Change music project series which brings together musicians from around the world. All profits go to their non profit foundation which builds music schools for children around the world. All PFC performers where recorded and filmed live outside and this musical journey takes us from the streets to the stage to the hearts of the people. Playing For Change is a movement uniting people everywhere through music. Music video by Maroon 5 performing Daylight Play for Change. (C) 2012 A&M/Octone Records
Maroon 5 - Daylight (Playing for Change)
Maroon 5 - Daylight (Playing for Change)
Maroon 5 - Daylight (Playing for Change)
No URL Maroon 5 - Daylight (Playing for Change)
How to Clean Your Chimney
Springtime chimney cleaning is very important. A through cleaning is recommended after a long winter of burning fires. The initial cost of purchasing a brush and the rods for cleaning your chimney can be in the 0 - 0 range depending on the size of your flue and the height of your chimney. Many times a chimney sweep can charge up to 0 to clean your chimney depending on the height and how dirty it is. Once you've purchased the brush and rods the rest of your chimney sweeping only requires some elbow grease instead of paying for a cleaning. If you want to share the cost see if a neighbor might want to split it with you. Cleaning your chimney isn't difficult; the hardest part of the job is getting out the ladder. Once you've dug the ladder out of the garage you're well on your way. Don't forget to take a tape measure, pen and paper up there with you, (there's nothing worse than getting back on the ground and forgetting what the dimensions were). Now that you're on the roof if you have a chimney cap remove it. Some chimney caps can easily be removed by loosening 4 thumb screws at the base. Some chimney caps are permanently mounted and the screws are on the lid.
Next measure the inside of your flue tiles and write it down. Take a good look at your chimney while you're up there. Creosote will tend to be the heaviest at the top of the chimney were it starts to cool during the burning process. If there appears to be little or no creosote buildup just black soot a wire brush will work fine. If the creosote is really thick you may want to consider a flat wire brush that will give you more surface contact.
Always use the bush that is the same size and the flue tiles. If the brush is too small you won't make surface contact or if too large you will jam the brush and bend the bristles. Next determine the total height of your chimney, from smoke chamber to the top. If it is a one story home the chimney would average 15', two story around 25'. Chimney brush rods are available in 3' 4' 5' and 6' sections that screw together. Chimney brush rods are made of fiberglass and are very flexible; they can bend 90 degrees or more. This allows for cleaning any bends in your chimney.
When selecting a chimney brush you will be amazed at the differences and cost. The double spiral brush contains more bristles which will give you more surface contact. This is great for moderately cleaning the soot. A single spiral brush with fewer wires is great for the quick sweep when there is just a light dusting of soot. The flat wire brush is best for the heavy jobs. If you have a metal chimney or your chimney has been relined a poly brush is recommended for cleaning. A poly brush will not scratch the inside or your pipe.
How to Clean Your Chimney
Justin Timberlake - Suit & Tie (Audio) ft. JAY Z
Tube. Duration : 5.47 Mins.
Justin Timberlake - Suit & Tie (Audio) ft. JAY Z
BUY NOW: smarturl.it Music video by Justin Timberlake performing Suit & Tie featuring JAY Z. (C) 2012 RCA Records, a division of Sony Music Entertainment
Justin Timberlake - Suit & Tie (Audio) ft. JAY Z
Justin Timberlake - Suit & Tie (Audio) ft. JAY Z
Justin Timberlake - Suit & Tie (Audio) ft. JAY Z
No URL Justin Timberlake - Suit & Tie (Audio) ft. JAY Z
Facts About Wood-Burning Fireplace Inserts and How to Make Them Work
Many households enjoy the antique atmosphere of having a fireplace serving as the centerpiece of any living room. But it takes a little bit of knowledge to understand how these traditional fireplaces actually work. Fireplaces cannot do their functions without any air as the fire will cease to burn. A draft then occurs after the air is channeled towards the fire and subsequently heated thus pulling the air from inside up the chimney. A vacuum is then created pulling the cold air in which is the main problem here.
Wood burning fireplace inserts are there to solve the problems when it comes to handling the burdens and expenses involved. Because these wood burning fireplace inserts use the same working technologies that wood burning stoves use, it is sure that these types of fireplace inserts will increase the heating efficiency of the fire being burned while maintaining Environmental Protection Agency certification to ensure that they can be safely used within the home.
Wood burning fireplace inserts are primarily made up of cast iron or plate steel to ensure clean burning and they have frontal doors that are made of glass to allow a clear view of the fire. These doors are special because they are self-cleaning so they can stay closed to further increase the heating efficiency.
Many of these fireplace inserts have blowers that are built in to enhance heat circulation in the room that it is installed in as well as other adjacent rooms. Depending on the model chosen, these blowers can be found mounted on the sides of the insert or inside the front. Some models may allow manual control while others can be controlled automatically through the use of a thermostat.
Vermont Castings offers a small and fine selection of wood fireplace inserts to choose from that can match the decors of any home. It uses the heat circulating blower standard and is EPA approved to meet the safety and environmental requirements. When looking for good wood burning fireplace inserts that match the quality of the ones offered by Vermont Castings, make sure that they are highly efficient while at the same time requiring as little wood as possible to avoid extra handling. Also take note of the BTU, burn time, and heating area to make sure that you get the best benefits possible.
Installing wood burning fireplace inserts is possible only if the insert has a positive connection from the outlet to the very first section of the flue liner. This is needed to make sure that the smoke goes up the chimney while minimizing the combustible deposits that cause condensation within the fireplace. An ideal installation option is to fully reline the chimney and make use of the smaller pipe size to provide a better draft. This installation method adds a significant margin of safety. It also makes cleaning a bit easier of the stainless steel pipe goes all the way to the chimney's peak.
With knowledge in choosing the right wood burning fireplace insert and setting up the wood fireplace insert, you should be able to feel the benefits of having one in your home especially during the winter time.
Facts About Wood-Burning Fireplace Inserts and How to Make Them Work
Justin Timberlake - Suit & Tie (Audio) ft. JAY Z
Video Clips. Duration : 5.47 Mins.
Justin Timberlake - Suit & Tie (Audio) ft. JAY Z
BUY NOW: smarturl.it Music video by Justin Timberlake performing Suit & Tie featuring JAY Z. (C) 2012 RCA Records, a division of Sony Music Entertainment
Justin Timberlake - Suit & Tie (Audio) ft. JAY Z
Justin Timberlake - Suit & Tie (Audio) ft. JAY Z
Justin Timberlake - Suit & Tie (Audio) ft. JAY Z
No URL Justin Timberlake - Suit & Tie (Audio) ft. JAY Z
Installing a Flexible Stainless Steel Chimney Liner
Why should you even bother to install a liner? They aren't cheap, but their benefits definitely outweigh their cost. The liner will protect your flue system, damaged or not, from the transfer of heat in your system to nearby combustibles.
Liners also keep your masonry safe from byproducts of combustion that can be extremely corrosive and damaging to your flue system. The gases produced by combustion will actually eat away at or deteriorate the mortar located in between the flue tiles in your chimney.
Flexible Stainless Steel Chimney Liners
If your existing flue system has been deemed unsafe to burn due to cracked flue tiles, missing mortar joints, etc., then looking into a flexible stainless steel chimney liner may be beneficial. Although rigid stainless steel liners exist, chances are that you may not be able to use this type of liner for your chimney. If your chimney has even the slightest bend to it, then a rigid liner just will not go down into the chimney. Also, you must be sure to use a flexible liner if you are installing for a new woodstove insert because more often than not you are required to bend the liner a little bit to fit it to the stove correctly. Consult a professional when deciding what type of liner will work best for you.
After you purchase your liner in the correct size and material for your particular flue system, carefully remove the liner and lay it out flat on a flat surface. Be cautious, the edges of the liner can be very sharp and potentially cut you. Start by attaching the bottom termination connector. Then tighten the hose clamp, being very careful not to over-tighten it on the liner. After measuring the exact length of the chimney (from the bottom to the very top of the crown,) add twelve to eighteen inches and cut the liner using tin snips. You need to properly install the bottom termination connector.
Chimney liner insulation is necessary along the entire length of the liner. To determine the correct width of the insulation, its time for a little grade school geometry: multiply the diameter of the liner by 3.14 (pi) to get the circumference of the circle, and then add one inch to this number because a one inch overlap is necessary to properly insulate the liner. So long as the insulation will fit in the chimney it is not necessary to have this exact number, it just cannot be any less.
Lay the insulation on the ground with the foil side facing the ground and place the stainless steel liner in the middle. After the liner is wrapped, use foil tape over the seam to keep it snug. After it is secured use one long piece of tape the length of the liner as a whole to cover the seam. This continuous piece of tape will secure the insulation the best.
Wire mesh is also necessary when it comes to insulating the liner. If this was not in place then the insulation itself can be damaged when being lowered into the chimney. Make sure your mesh covers the entire length of the liner. Do not forget to encapsulate the bottom connector piece as well. Hose clamps are the best for attaching the mesh, and they are usually included in the liner kit. Use the clamps to attach the mesh to one end of the liner. Pull the mesh on the other end of the liner until it fits tightly and use the hose clamp to secure it. For safety reasons, use the same tin snips as before to cut away any extra.
Working on a roof, no matter what you are doing, takes many safety precautions. Be sure that you take all of these precautions and you have enough people to safely install the liner. You will be basically dropping the liner down through the top of the chimney and feeding it the whole way through to the bottom. It may become necessary for a rope to be tied to the bottom of the liner and someone standing inside the home pulling from the bottom. Be sure to keep the liner as centered as possible while dropping it down into the flue system. This will prevent any damage to the insulation or the liner itself.
After your liner is in the correct position, it is time to cut the top of the liner to fit correctly. Be sure to leave four extra inches showing on the outside of the flue system so that the liner is equal to the height of the crown. Hold the bottom connector in place firmly and apply silicone caulk to the top of the first terracotta flue tile or the chimney crown itself. Then, place the top plate over the liner and press it into the caulking. Tighten the connecting clamp or band around the liner to secure the liner to the top plate. Then, install your stainless steel cap by placing it over the collar of the top plate.
If you are connecting your liner to the appliance vertically, simply connect the appliance connector to the liner and bottom termination point. If you are using a vertical connection then you are finished! If you are connecting horizontally, decide upon the point where the pipe will come through the wall to connect to the tee body. Cut a hole through the insulation and mesh to indicate where the tee snout and tee will connect. Secure the snout and body of the tee using a metal band that should be attached and wraps around the tee body's backside. Insulate the snout of the tee and fill the hole around the snout with brick and mortar.
Be careful to follow any given directions for your particular flue liner, keep the edges of the stainless steel smooth and be cautious while working on the rooftop of any structure.
Copyright (c) 2009 Clay Lamb
Installing a Flexible Stainless Steel Chimney Liner
Justin Timberlake - Suit & Tie (Audio) ft. JAY Z
Tube. Duration : 5.47 Mins.
Justin Timberlake - Suit & Tie (Audio) ft. JAY Z
BUY NOW: smarturl.it Music video by Justin Timberlake performing Suit & Tie featuring JAY Z. (C) 2012 RCA Records, a division of Sony Music Entertainment
Justin Timberlake - Suit & Tie (Audio) ft. JAY Z
Justin Timberlake - Suit & Tie (Audio) ft. JAY Z
Justin Timberlake - Suit & Tie (Audio) ft. JAY Z
No URL Justin Timberlake - Suit & Tie (Audio) ft. JAY Z
Keywords:
Keywords:
Keywords:
Keywords:
Keywords:
Keywords:
Tags: